

Getting ready to fly isn’t as simple as booking a ticket and packing your suitcase – but don’t worry we’ll have you navigating the airport like a seasoned traveller. Whether you’re heading off on a quick domestic getaway or jetsetting on an international adventure, the process can be overwhelming if you’re unprepared. Between packing the right size bag, airport security rules, and tight connections, there’s a lot to manage.
In this guide, we’ll take you step-by-step through what you need to know about getting ready to fly, including when to arrive, how to breeze through airport checks and how to move through the airport with confidence and ease.
Disclosure: I may earn compensation from the purchase of any product or service linked on this website, at no extra cost to you. I only link to products I use and love, therefore feel comfortable recommending.
Table of contents
Pre-departure
There are a few things you need to do or consider before you leave for the airport, to ensure a smooth process. Here’s how to get started:
Luggage
Air travel luggage sizes and weight limits depend on a number of factors: whether you’re checking or carrying on, your ticket type and airline. North American carry-on sizes are a lot more generous than those in say, Europe or Australia. So it’s important to check on the size and weight requirements with your airline, before you begin filling your bag. If you’re not sure if you should check a bag or try carry-on only, see my full breakdown of the pros and cons here.
Pro tip: If you bought a carry-on only ticket, but need more room, most airlines will let you add a checked bag for a fee. Doing this online, in advance is generally cheaper than at the airport, on the day of your flight.
Packing
Some items are prohibited from checked baggage, and others from carry-on. It’s important to know which one goes where, so you don’t find yourself repacking at the check-in desk or getting items confiscated at the airport security checkpoint.
Namely, any flammable objects such as lithium batteries (including those permanently installed in devices), e-cigarettes, and flammable substances are not permitted in your checked bag. Conversely, sharp items and excess liquids are not allowed in carry-on bags. If you need to check which goes where, use this handy “What Can I Bring?” tool.
Pro tip: If you’re checking your bag, always take one outfit in your carry-on or personal item, in case your bag is lost or delayed. If you’re going to a special event, take the most important outfit in your carry-on.
Documents
Don’t leave home without that all important identification document. Whether it’s your passport or drivers’ license (must be REAL ID-compliant in the U.S.) will depend on where you are travelling.
Ground transfers
Make a plan for how you will reach the airport, considering how long in advance you need to arrive and the luggage you need to take with you. If you’re self-driving, think about traffic, parking availability and cost. Is public transport a viable alternative? Are rideshare services permitted at the airport you’re going to, or do you need to take a traditional cab?
When to be at the airport before your flight
There’s no one-size-fits-all answer to this question, but here are some general guidelines to help you plan:
Domestic Flights
- At major airports with higher passenger volumes (think LAX, JFK, Heathrow, Toronto Pearson and Sydney), aim to arrive at least 2-hours before your scheduled departure.
- For smaller regional airports, 90-minutes might suffice, but always check with your airline to be safe.
International Flights
- For all international flights, regardless of airport size, it’s recommended to arrive at least 3-hours prior to departure. This allows for check-in, security, immigration and potential delays.
Pro tip: For travel in peak periods (holidays, weekends, early mornings), consider arriving even earlier.


Three checks: the airport process
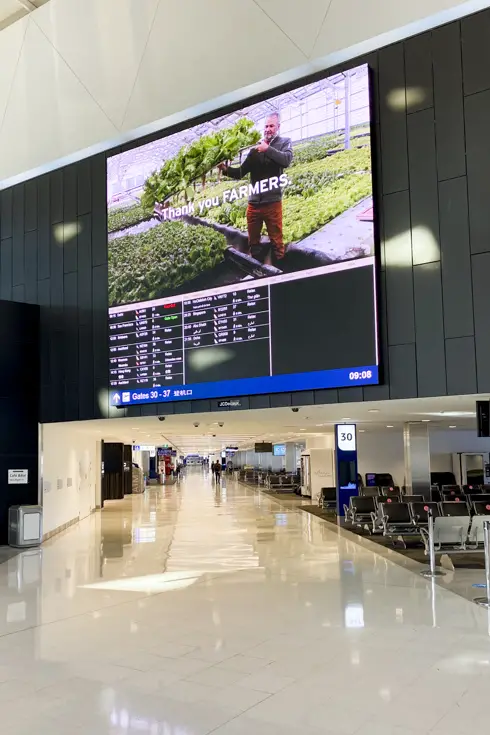
Once you’re inside the airport terminal, it’s time to work through the key airport checkpoints. Here’s what to expect and how to prepare.
1. Airline Check-In
What it is:
This is where you confirm your presence for the flight, check your bags, and collect a boarding pass (unless you’ve done this online).
What to expect:
When you arrive at the airport, your first step is to look for your airline’s check-in desk. Here you’ll be asked your final destination and handover your identification (sometimes you might need your ticket number or booking reference too). Depending on the airline, some have kiosks where you might have to enter the details in yourself, others there will be someone to do it for you. Your seat assignment will also be confirmed at this point in the process. If a visa is required for your destination, there will be an additional, human check.
Lastly, this is where you’ll leave any checked bags. You’ll be asked to confirm that you don’t have any flammable objects in your checked bag. Additionally, this is your last chance to transfer any items not permitted in your carry-on bag (e.g. that metal nail file or fork floating around your handbag), over to your checked luggage so it is not confiscated when you reach security.
How to prepare:
- Check baggage allowance and airline baggage size requirements ahead of time to avoid extra fees.
- Have your ID (must be REAL ID-compliant in the USA) or passport and booking reference ready. If you need a visa for your destination, the check-in agent will need to verify this also.
- If travelling carry-on only, and you’ve checked in online, you can skip this step and go straight to security. Make sure your phone is fully charged if you are using an electronic boarding pass.
2. Security Screening
What it is:
Airport security checks are mandatory before entering the departure gates—only staff and passengers may pass this point. They are to ensure the safety and security of those flying. Both you and the items you are carrying on the plane will be scanned to pick up any prohibited items.
What to expect:
Security is often the longest and most frustrating part of the airport process, so being prepared helps a lot. Be patient and allow yourself plenty of time. Pack your carry-on items and dress with the following in mind. At the same time, be mindful that security procedures can vary. Pay close attention to the instructions given as you pass through this checkpoint.
How to prepare:
- Remove laptops and tablets from your bag. Some airports require larger cameras to also be removed and scanned separately.
- Take off belts and jackets.
- Shoes often need to be removed, especially for flights bound for U.S. destinations. Wearing easy-to-remove shoes will speed up the process, and consider wearing socks so you don’t have to walk barefoot on the airport floor.
- Empty your pockets.
- Water bottles must be empty — you can refill after security.
- Keep your electronics and liquids at the top of your bag for quick access.
- Liquids, gels, pastes and powders are restricted. Each passenger is allowedone clear, resealable bag – 1-litre (quart-sized in the U.S.). Each container inside must be 100ml/3.4oz or less – not a bigger bottle that’s partially full. This applies to personal care items, cosmetics and food products like yogurt, dips, sauces, peanut butter and more.
- Follow all airport security rules to keep the line moving smoothly.
Pro tip: TSA (Transportation Security Administration) is a U.S. government agency. If something says it is TSA-approved, for example a reusable liquids bag, it only applies to U.S. airports and may be rejected internationally. A simple ziploc bag is the most universally accepted.
3. Customs and immigration (international only)
What it is: This is where officials check your right to enter or leave a country. They want to ensure you have the proper permission to visit, do business or live in your destination—whichever applies.
At this point, they will also check what you are bringing with you. They are predominantly looking for three things: items that you might be on-selling for profit (they incur duties); items that may pose a biosecurity risk (e.g. invasive species and agricultural disease); and items that are illegal in your destination.
What to declare:
- Fresh food, plants, animal products, natural materials – even souvenirs like shells and wooden carvings.
- High-value items such as cameras, electronics or jewellery may require declaration depending on the country.
- Large sums of cash over the allowable limit (check local regulations).
How to prepare:
- Fill out any declaration forms accurately.
- Be honest — fines for failing to declare can be steep.
- Know the entry requirements of your destination (visa, onward ticket, vaccination proof, etc.).
- Make sure your passport has enough validity for your destination (some countries require six months’ validity).

Navigating the Airport with Ease
Once you’ve cleared check-in and security, it’s time to find your gate, grab a snack, or simply relax before boarding. Here’s how to breeze through the rest of your airport experience.
Terminal navigation tips
- Follow the signs – Major airports have clear signage guiding you to amenities, gates, lounges and inter-terminal transport such as shuttle buses.
- Download the airport’s app – These often include maps, wait times and food options.
- Check for gate changes – keep your boarding pass and monitor screens or alerts on your airline’s app.
More tips to make yourself comfortable
- Use lounge access if your ticket, credit card or travel rewards allow — or consider purchasing a day pass.
- Bring an empty, refillable water bottle and fill it post-security.
- Carry snacks, a power bank, noise-cancelling headphones for max comfort. A travel pillow and eye mask are also great for longer haul flights. For all my long-haul survival tips, see this post.
- Download music, podcasts or shows to watch in case the airline’s entertainment system malfunctions or you don’t like the selection.
Transfers (multi-leg flights)
Airports can be chaotic, especially if you’re dealing with tight layovers or a new terminal. Here are tips to keep your journey smooth:
- Check if you need to re-check baggage – Some international connections require you to collect and re-check bags even if they’re tagged to your final destination.
- Leave extra time between flights – If you’re booking your own connecting flights (not on one ticket), allow at least 2-3-hours.
- International-to-domestic? – You’ll likely go through immigration and customs before re-entering through security for your connecting flight.
- Check the airport map – Get oriented in advance so you know where to go, especially at sprawling airports like Heathrow, LAX or Singapore Changi. Sometimes changing terminals requires transport such as shuttle buses or light rail services.
- Keep essentials handy – Passport, boarding pass, phone, liquids bag and electronics should all be easy to reach.
- Use mobile apps – Download apps for your airline and airport to get real-time updates on gates, delays and directions.
Skip the line
In the U.S., take advantage of “skip the line” programs at busy airports. These include paid and free services that may or may not apply to all passengers. Check the details on their respective websites.
- TSA PreCheck – lets you use dedicated lanes, keep shoes and light jackets on, and avoid removing electronics or liquids when passing through security. Great for frequent domestic travellers.
- Global Entry – includes TSA PreCheck and lets you clear U.S. immigration faster on return trips. Global Entry is generally only for U.S. citizens and certain visa holders.
- CLEAR – uses biometric ID to fast-track security lanes at select airports.
- Airport-specific programs like Spot Saver at SEA-TAC (Seattle-Tacoma Airport) allow you tobook a security time slot in advancefor free, helping you avoid long queues.
Outside the U.S., similar services like SmartGate in Australia, ePassport gates in the U.K., and NEXUS in Canada offer fast-track options for eligible passengers.
Final thoughts on preparing for air travel
Getting ready to fly doesn’t have to be stressful. With a little planning and know-how, you’ll sail through the airport like a seasoned jet-setter. Remember to review airport security rules, allow enough time for check-in and customs, and travel light when possible.
Whether you’re heading across the country or across the globe, preparing for air travel with confidence starts the moment you book your ticket and ends when you’re sipping a flat white (or mimosa) near your gate.
Got more questions about navigating airports or getting ready to fly? Drop them in the comments — happy to help!
Peace, love & inspiring travel,
Madam ZoZo
Pin for later…


