
Whether you are using your iPhone or a DSLR, these aerial photography tips will help you take better photos of your once-in-a-lifetime flightseeing adventure.
When we signed up for our Alaska flightseeing and bear viewing trips, I realized that I had never done any kind of aerial photography. James had commandeered the camera on our previous flights over Niagara Falls and the Cook Islands. I started madly diving into internet rabbit holes for advice. As an amateur photographer, going on a once-off flightseeing tour, I wasn’t going to invest in a new lens or specialised equipment. I needed simple, practical advice on how to get the best out of what I had. I learnt some very helpful pointers and here are some of the results…


Aerial photography tips:
In the following, I’ve distilled down five simple and effective aerial photography tips to help you capture better photos of your flightseeing trip.
1. Wear dark clothing
I know this is totally contrary to what I said in my Alaska Packing Guide, but this is the one instance where dark clothing is helpful. Why? Dark-coloured clothing creates fewer or less noticeable reflections in the windows of the plane or helicopter which your camera will reproduce as bright streaks or spots in your photos.
2. Bad vibrations
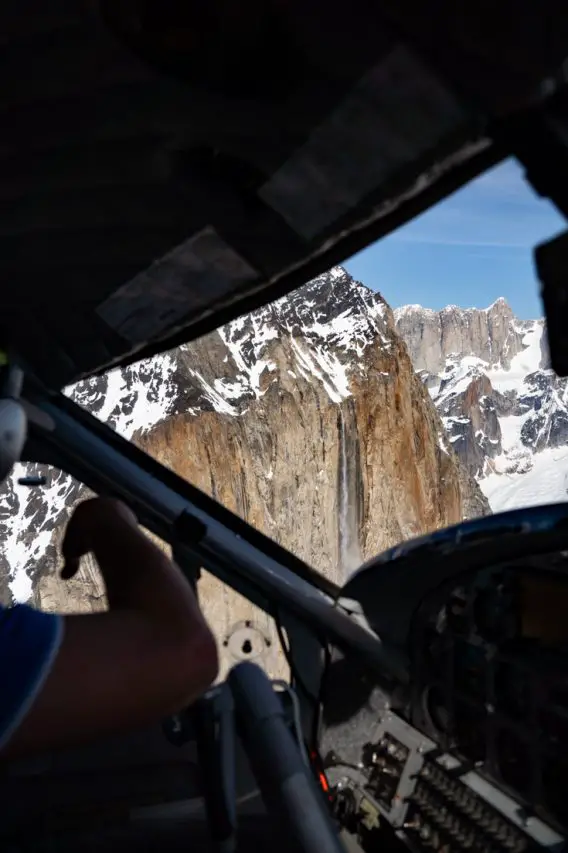
Do not lean on the windows or sides of the aircraft. Aeroplanes and helicopters vibrate quite a lot and even though it is tempting to steady yourself by resting on the side of the plane or helicopter, it will actually create more movement in your image. Getting close to the window will help you capture fewer reflections from inside the plane, but you want to avoid actually touching the window.
3. Seat selection
Good flightseeing operators usually fly in circuits or lap specific geographical features in both directions so people seated on each side of the plane get equal viewing. Therefore, which side of the aisle you sit on is not so much a consideration. Whether you sit near the front or back of the craft is.
If you are seated near the front of the plane, you are more likely to capture the propellor blades. This isn’t always a bad thing, you could turn it to your artistic advantage. However, for the most part, it is something you want to avoid by sitting closer to the rear of the plane.
You will probably capture the wings of the plane in your photos–they tend to be unavoidable, but easier to use as framing or leading lines in your composition than frozen propellor blades.


4. Feel the need for speed
Ok, a flightseeing aircraft is not a fighter jet but it’s still moving at a good pace. You’ll need to use a fast shutter speed (i.e. fast exposure) to match. Ok, I know this is starting to sound technical but bear with me and I’ll simplify as much as possible.
You know how when you move while taking a photo it comes out blurred?! Ok, well that applies when you are taking photos from a moving vehicle or aircraft. The way photographers get around that is by using a fast shutter speed, meaning the camera snaps the picture faster, in order to freeze the movement.
For our more advanced photographers, the rule of thumb is to shoot at eight times your focal length. I recommend using your camera in Shutter Priority mode, which will facilitate fewer setting changes while you are in the area.
Phone camera users, sorry, you have almost no control when it comes to shutter speed. I do have a cheat for you, though. Take some short video, Live/Motion photos (those short photo/video hybrids) or photo bursts. You can then select a single frame to use as a still image. Here are links to instructions for popular phone models:
- Instructions for burst and Live Photos on iPhone are both covered here.
- Burst photos as well as Live, or rather Motion Photos, on the Samsung Galaxy here.
5. It’s ok to be shallow
Use a shallow depth of field (aka low aperture or low f-stop). First, the reason we want to do this is that it would be very rare to get on a plane that has perfectly clean windows with no scratches or chips. To avoid capturing these imperfections in your photos, we want to use a low f-stop which creates a shallow depth of field.
A shallow depth of field means that less of the image is in focus. In other words, when you focus your camera on the mountains or other subjects of your photograph, whatever is in the foreground e.g. dirt on the windows, will be blurred or even invisible.
Unfortunately, if you are shooting with a phone you don’t have true control over the aperture—so you’ll need to work with what you have. Note that f-stop control in Portrait Mode on your iPhone is not truly aperture control, but more of a filter that blurs the background to create the illusion of a small aperture. It won’t work for this purpose.
However, you can specify what you want your phone camera to focus on by composing your shot and tapping the screen of your phone where you want the focus (i.e. crispest part of your image) to be, right before you hit the shutter button.
Enjoy your flightseeing adventure and I hope these aerial photography tips will help you capture some great memories.
Peace, love & inspiring travel,
Madam ZoZo