")
California’s Yosemite is one of the United States’ top 10 most visited National Parks—known for its dramatic glacier-sculpted valleys, Sierra Nevada peaks, towering Giant Sequoias and geological features that make rock climbers salivate. Experience the Park’s famous features and be blown away by incredible vistas on this Yosemite 2-day itinerary.
For more California National Park tips and itineraries see these posts:
Californian Redwood Forest Road Trip: Best 2-Day Itinerary
10-Day Wanderlust-Worthy California Road Trip Itinerary
Some Like it Hot: Summer Death Valley Itinerary
How to Rock a Joshua Tree Day Trip
Disclosure: I may earn compensation from the purchase of any product or service linked on this website, at no extra cost to you. I only link to products I use and love, therefore feel comfortable recommending.
Getting to Yosemite National Park
Yosemite National Park is located in central California, within the Sierra Nevada Mountain Range. The closest airport is Fresno Yosemite International, which receives direct flights from 15 cities including Chicago, Seattle, Portland, Denver, Dallas and Salt Lake City. The Airport is 2.25 hrs drive from Yosemite Valley.
The next closest is Sacramento (about 3.5 hrs drive), while San Francisco (4 hrs) and Los Angeles (5.5 hrs) are a little further. During the summer/fall months when Tioga Pass is open, Carson City, Nevada is about equal driving distance as San Francisco (4hrs). From the airport, you will need a vehicle to reach the Park.
Where to stay in Yosemite National Park
Lodging within the Park is ideal so that you can get started early each day, especially in summer when visitation to Yosemite is at its peak. Lines to enter (and depart) Yosemite can be hours long, which can be avoided by staying inside the Park boundary. Staying within Yosemite Valley is going to cost more, but it is worth the time you will save.
See the National Parks website for the various lodging options ranging from luxury hotels to campsites. Due to our last minute visit during the summer peak, it was a challenge to find accommodation inside the National Park. Our best option available was a vacation rental in West Yosemite. Though it wasn’t as ideal as staying right in Yosemite Valley, it was still within the Park and enabled us to dodge the long lines getting in and out each day. It was also self-contained, so we could make our own meals.
How long do you need to visit Yosemite?
Due to the colossal number of things to do and see in the National Park, this 2-day Yosemite itinerary does not include transit time to and from the Park. Ideally, you would arrive the evening before or early morning of day 1 and depart after sunset on day 2 or on day 3. In other words, this is a FULL 2-day itinerary (best for a long weekend) and the minimum you would need to see Yosemite National Park.
Getting around Yosemite
While exploring the National Park during peak times, finding a parking spot can be almost impossible unless you arrive early in the day (before 8 am). This is not such an issue if you are staying in Yosemite Valley as I suggested above. Once you are inside the Park and have staked out a park, use the shuttle bus service as much as you can to get around.
NOTE: The shuttle bus service will not operate in 2021 due to the COVID-19 pandemic.
Yosemite 2-day itinerary
Day 1
Kick-off day one in the Park by hiking the absolute must-sees of Yosemite Valley, which are tied together by the Valley Loop Trail. Sights include Lower Yosemite Fall, Mirror Lake, Half Dome, El Capitan, and Bridal Veil Falls. Depending on your hiking stamina or interest, you can take the Full Loop at 18.5km (11.5mi) or the half loop at 11.6km (7.2mi). Both loops travel across mostly level terrain and are rated Moderate. Half Loop Hikers will miss out on close-ups with El Capitan and Bridal Veil Falls, but these can be accessed separately using the shuttle bus service.
Note: There is no Loop Trail access to the base of El Capitan, if you really want to stand at the bottom of this awesome cliff, you’ll have to digress onto the climber’s trail. Also, Mirror Lake is mostly dried up in summer but still has a lovely view. Swimmers should check out the natural dam on Tenaya Creek, very close to Mirror Lake, which has water even in the summer months.
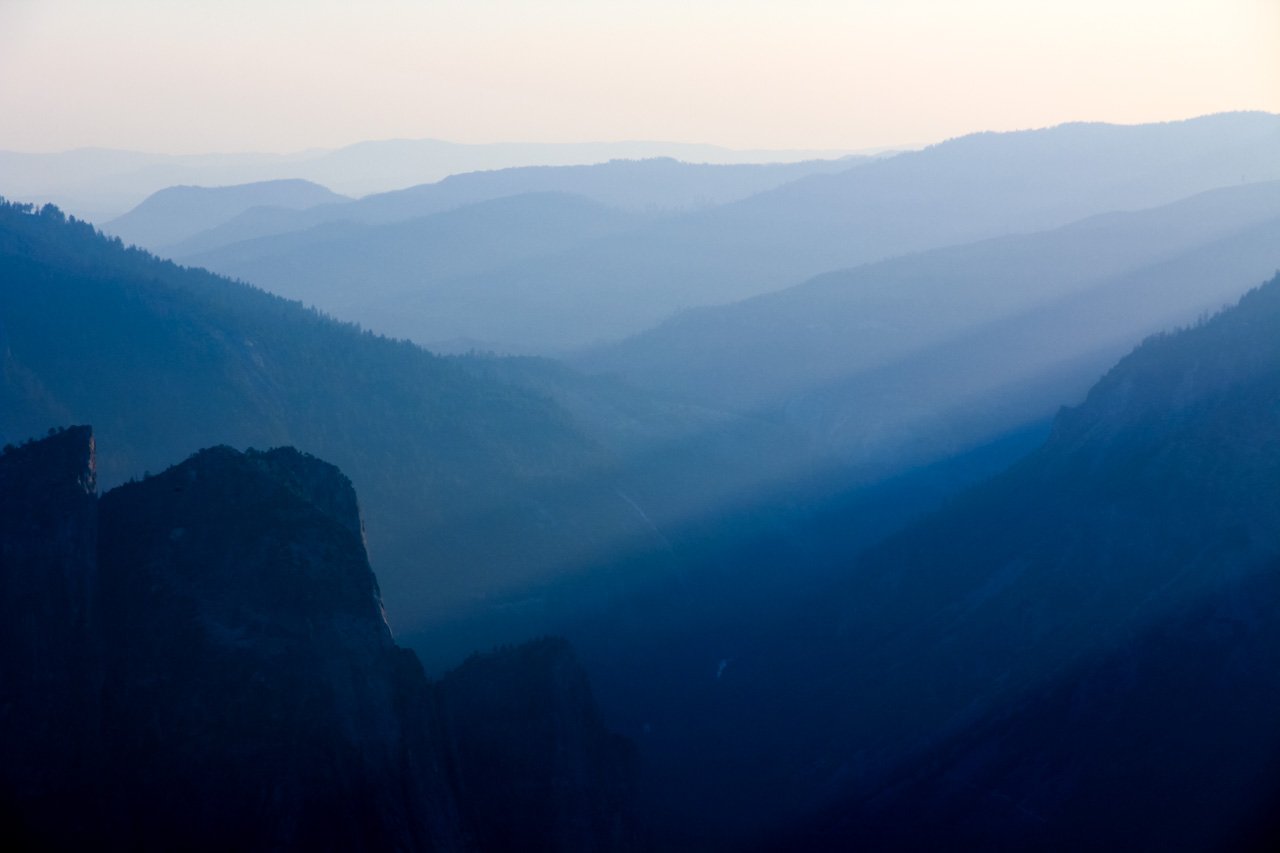
To close out day one, make your way to Tunnel View for pre-sunset. There is no shuttle service to Tunnel View, so you’ll need to take your own vehicle and parking is limited. It is best to get there an hour or more before sunset for photos because the mountains cast deep shadows on the Valley as the sun drops.
Day 2
Begin day two by hiking the Mist Trail and John Muir Trail, stitched together into a loop. The Mist Trail is incredibly popular, and justifiably so, therefore its best to get an early start to avoid the crowds. You can take the Mist Trail up and back, but I recommend going up via the Mist Trail and returning using the John Muir Trail to vary your route and avoid hiking traffic. These trails are rated as strenuous due to their length and steep terrain.
It’s 2km (1.2mi) to the top of Vernal Falls – be prepared for steep and slippery steps and soaking waterfall spray (“mist” is a severe understatement). Take a break at the top of Vernal Falls, with beautiful valley views. Continue up the steep switchbacks of the John Muir Trail, before you descend the other side and rejoin the Mist Trail to hike back to the trailhead near shuttle bus stop #16. From the John Muir Trail, you will have great views of Nevada Falls in the upper valley and find a great vantage point to look down upon Vernal Falls.
Note: Rain jackets and waterproof bags/cameras are recommended if you prefer to stay dry and warm on the Mist Trail. We hiked this on a warm, sunny, summer’s day and welcomed the drenching on the steep climb and found we had dried out by the time we finished the complete circuit.
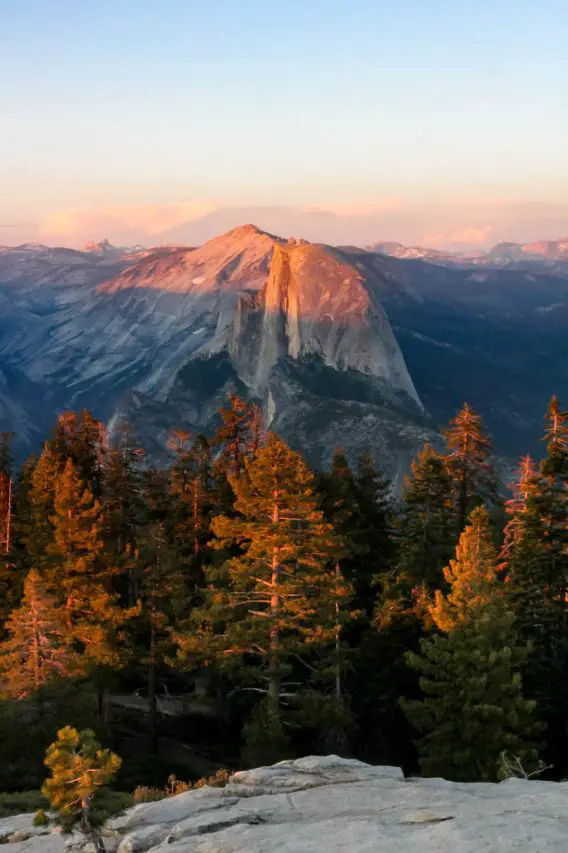
Next, take your vehicle up to Glacier Point – you might like to watch sunset from here. However, be wary that during the height of summer, traffic leading to Glacier Point nearing sunset is horrendous. If you find yourself stuck in a long line of traffic, Wawona Point, also on Glacier Point Road, provides comparable views.
If you are ready to hike a few more miles, I suggest snapping some pics from Glacier Point and then backtracking down Glacier Point Road to the Sentinel Dome/Taft Point trailhead. Walk the moderately rated 3.5km (2.2mi) round trip, taking time on the summit of the dome to watch the sun go down. It can get windy up there, so take warm clothes even on a summer day. Sentinel Dome is the perfect setting for a dinner picnic. Take a flashlight or headlamp for the dusk hike back to the carpark.


What to take on your hikes in Yosemite
Most of the Valley Loop is within short range of the roads through Yosemite Valley, however, on hikes such as the Mist Trail, or Sentinel Dome you will want to go fully prepared. Here’s what to put in your pack:
- Map and compass, internet is practically non-existent so relying on Google is futile.
- Plenty of food and water.
- Rain gear and warm clothing.
- Matches and/or a lighter.
- First-aid kit.
- Flashlight/headlamp.
- Hat, sunglasses and sunscreen.
- Binoculars and camera.
- Insect repellent.
Remember… take only photos and leave only footprints.
Peace, love & inspiring travel,
Madam ZoZo

